Wednesday, March 2, 2016

Triangulating Concave and Convex Polygons — Ear Clipping

The Problem

OpenGL and other low-level rendering APIs are limited to rendering convex polygons. This causes a complications to arise when trying to render concave primitives. In my case, I wanted to be able to render arbitrary 2D "ground,"  and not succumb to manually breaking apart the polygon into OpenGL-compatible primitives. Thus the search for a triangulation algorithm arose. All I could find were algorithm names without accompanying implementations or explanations, and long mathematical abstracts on computational geometry. Any implementations I did find seemed to be extremely over-engineered and over-complicated for easy comprehension and adaptation. I finally settled on writing my own implementation of the ear-clipping algorithm to facilitate triangulation.

What We Will Accomplish


139-vertex polygon Triangulated


Friday, June 21, 2013

Setting Settings of Arbitrary Types in C++

It's been a while, but things are still slowly moving along. Working a 40-hour week doing web development leaves me with little time or energy to make game development progress!

I've begun a new iteration of my rendering engine, IronClad, now dubbed Zenderer. Over the past few weeks I've slowly been adding various modules and utilities to it, such as audio, file parsing, and asset management. Nothing is being rendered on the screen just yet, but that's next!

This post is primarily dedicated to creating a settings module that will accept arbitrary types, such as ints, floats, std::strings, and even bools. The final result will allow something like this:

// Optional file to parse immediately
CSettings Settings("SettingsFile.dat");
Settings.Init();

// Set settings
Settings["WINDOW_WIDTH"]    = 800;
Settings["WINDOW_HEIGHT"]   = 600;
Settings["WINDOW_NAME"]     = "Zenderer Window";
Settings["WINDOW_FS"]       = false;
Settings["SCROLL_SPEED"]    = 5.2;
Settings["FRAME_RATE"]      = 60;

// Retrieve settings
if((size_t)Settings["FRAME_RATE"] < 20)
{
    std::cerr << "[FATAL] Frame rate is too low for adequate gameplay.\n";
    exit(1);
}

// Change settings, regardless of type
Settings["WINDOW_FS"] = true;
Settings["WINDOW_NAME"] = 42.335f;

We will do this by creating an extremely dynamic COption class that accepts all different types for values and turns them into strings behind the scenes.

Wednesday, March 27, 2013

Yet Another Quad Tree Tutorial

There was nothing to show for Screenshot Saturday this week, but that doesn't mean there hasn't been any progress! I spent the weekend writing a quad-tree implementation and integrating it into the existing engine. It was not a very hard process, and there are already dozens of tutorials available online for this, but this guide may still come in handy for someone.

How Do Quad Trees Work

You may be familiar with a binary tree. Essentially there's a "root" structure (known as a "node") that branches out into two nodes (binary = two). Then, each of these nodes splits into two of their own. This continues as long as necessary. The nodes that aren't split are called "leaf" nodes.
Quad trees work exactly the same way, except the nodes are split into four parts rather than two. This is useful for video games because the screen is a rectangle, and can thus easily be split into smaller subsequent rectangles. Here's a screenshot of a stress-test quad tree in progress:


The small, 8x8 quads represent particles with physics. Each quad you see can contain a maximum of 32 (an arbitrary value) particles before it automatically splits into 4 nodes. The tree cannot go more than 6 levels deep, though, because that would eventually cause a stack overflow due to the recursion inherent to quad trees.

You can see this live, in-action by downloading a demo here (pardon the dependencies, I used my old wrapper classes to write this). Hold keys to generate particles, or use the mouse to set them in certain locations. Right-click the mouse to test for a collision with the large blue quad. The result will show up in the console window as a 1 (true) or 0 (false). You can notice that the operation is performed incredibly quickly, even with an insane amount of particles on the screen. That is the power of a quad tree.

Note: If you get DLL errors, you may need to install the VC++ redistributable from here.

Friday, March 15, 2013

Blurring The Line

This week, I've got some minor updates done. With midterms and projects across the board, it's been a pretty insane week, and not much progress has been made on the game visually. Behind the scenes, I've got some code-restructuring, and the beginnings of an enemy class. On the visual side of things, I've got a new game-play mechanic to show off!

While tweaking the time-trail algorithm, I realized that a particularly clever player could stand in a very bright area for an extended period of time to cast himself further into the future, then just skip throughout the level unnoticed by enemies while his past self slowly trudged through the layers of time. As I wondered about how to fix this, I realized that I had a couple of Gaussian blur shaders already implemented for when I was testing post-processing in my rendering engine. So I decided to test what it would be like if the player was faced with an increasing blur of the world around him as he traversed through time.

Here are a couple of screenshots showing the differences:
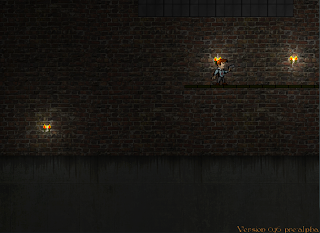
A small delay, ~1 second A much larger one, ~10 seconds


The idea is that the player will not be able to accurately see what's going on in the level as the blur increases, and thus will be deterred from traveling a large amount into the future.

Algorithm Details

For the time-trail algorithm, I created a method called CWorld::CalculateLightInfluence(). It, aptly named, calculates the sum of the three most-influential light sources. It used to rely on distance, but that only makes sense if all of the lights have the same attributes, so now the actual influence is calculated and compared for all of the lights. The calculation is as follows:

distance * 200.f / (Constant Attenuation + Linear Attenuation * distance + Quadratic Attenuation * distance2) * brightness

This is almost the same as the algorithm I use in my lighting shader, except it's done on a single light rather than every pixel of the entire screen, heh. I can easily tweak the 200.f constant if I want lights to have more or less of a cumulative influence. So, this value is summed, capped at a range of [0, 5), and returned to the world for further processing.

Back in CWorld::Update(), this value is then used to create time-trail instances. After this, the blurring algorithm is performed. It determines the total time between the current time and the time-trail active at the moment. This represents the amount of time ahead the player is. This value is divided by 10000, because the Gaussian Blur shader only works well with really small radius values. It's clamped to [0, 1/300]. The larger the value, the closer it is to the limit, and thus the blur increases!

I want to tweak this to be a progressive algorithm, rather than just a linear increase. In the near future, I'll make a spread-sheet and maybe apply a increase based on a stretched out x2 graph, like maybe x2/8


Saturday, March 9, 2013

More Menu Magic

Some small, but beautiful updates this week!
The GUI keeps on improving, with new menus and transitions! I've added an options menu with functioning toggles, a credits menu with full recognition, a transition sound effect, a critical audio bug fix, and some updates to the player-trail algorithm!

Check out the screenshots below:

Friday, March 1, 2013

Making a Menu

I've been a bit quiet the past few weeks on here, but I've been actively participating in Screenshot Saturday on /r/gamedev. You can see last weeks here, and the one prior here.

This week, I've worked on creating a flexible, slick UI system for making menus. It proved to be pretty complex, and I used a seriously ass-backwards technique to get it accomplished.
You can think of a button as an physical entity, right? You need to be able to check collision, move it around for transitions, and swap textures easily. So I created a CButton class with a CEntity inside. At first, I just had a button texture rendered to the screen as a mesh, and the text rendered on top without being a part of the scene. This worked okay, but I wouldn't be able to add shader effects to the text portion of the buttons, which would look weird. So I had to have them both be a part of the scene.

Sunday, February 10, 2013

Animating 2D Sprites in OpenGL

In working on my latest game, Praecursor, it came time to develop a system for easily animating sprites on the screen. I found a very nice sprite for a hero on OpenGameArt, and wanted to integrate his various animations into player actions. In the process, I created a CAnimation class that would extend the CRigidBody class, making it eligible to act just like a physical entity and be rendered on the screen with relative ease. The entire process was fairly challenging, requiring a custom file format parser and a new fragment shader. The following is a tutorial-like thought process that went into the development of animate-able sprites.

Layout

The CAnimation class is supposed to act exactly like a regular physical entity, but should support loading of custom .icanim files and have various functions related to animation. These include toggling animation, setting an automatic animation rate, quick-swapping sprite sheets, and manually switching sprites.

Quick-swapping seems like a pointless functionality of an animation class; after all, why not just create a separate instance and load it with the new sprite sheet? Well, I didn't think about this until I started trying to swap-out animations for running, jumping, and standing with the main player instance. When I would just have a list of animations and do m_Player = m_allAnimations[JUMP], the player would lose his physics properties, such as gravity or jump force. I tried a few workarounds, but none of them turned out like expected, so I decided to add a SwapSpriteSheet() method to the CAnimation class. This will attach a new texture to the material and give the shader new parameters based on width and heights.

In the future, I think I will change the class to incorporate animation boundaries, so I don't need to load a separate image for each animate-able action. I would be able to do something like SetAnimationIndex(0, JUMP), and the animation would only loop through sprites [0:JUMP], then if I wanted to just play the standing animation, I could do SetAnimationIndex(JUMP + 1, STAND), assuming the standing animation comes after the jumping one in the sprite sheet. This would likely all but eliminate the need for the swapping method.

Sunday, February 3, 2013

Rendering Text in OpenGL Using FreeType Fonts

EDIT (04.14.2013): Tutorial updated to handle new-lines (\n character)

I finally decided to tackle the rendering of TrueType fonts in my engine. It proved to be a much bigger challenge than I had originally anticipated; I perused over dozens of outdated guides, tutorials, code snippets, and documentation files to finally achieve something legible on screen. I decided to provide a complete guide to this process so that if anyone should decide to follow in my footsteps, they will know where to go.

Tuesday, January 22, 2013

First Praecursor Screenshots

I'm trying so hard to stay motivated on this project, it has a lot of potential in my mind. With the spring semester just starting, I hope I'll be able to keep time available to work on Praecursor. Feel free to follow my progress on the game's GitHub page.

I've made some progress on the game. I found an excellent free texture pack with lots of textures perfect for an urban, impoverished setting. They are incredibly realistic, so the main hero stands out like a sore thumb. Here are a few screenshots:

Player is way too small!

Tuesday, January 15, 2013

A New Beginning

For the past several weeks, I've been working on implementing a 2D OpenGL rendering engine dubbed IronClad. A lot of progress has been made, and I have decided to start working on a new project that will fully utilize the features of my engine. You can find the source code on my GitHub page here.

Implemented Features

  • Full use of modern OpenGL features such as vertex array objects
  • Instanced geometry which allows for high-speed, batched rendering of many vertices
  • Per-pixel shader-based lighting (currently only point lights)
  • Optimized mesh loading
  • Entity wrapper for easily controllable mesh instances
  • Minimalistic physics system
  • Loading of a custom level format for easy scene creation


Latest Project: Praecursor


Precursor - n. 
  1. A person or thing that comes before another of the same kind; a forerunner
  2. A substance from which another is formed, esp. by metabolic reaction. 

Story


Tuesday, November 13, 2012

A Guide to Instanced Geometry

As stated in the title, this is more of a guide than a tutorial. It isn't for the complete beginner, some experience is necessary. Throughout this I assume you have a general knowledge of what a mesh is, basic understanding of how matrices work, basic knowledge of GLSL, and experience with C++ or another object-oriented language. I am just writing about my own personal implementation of instanced geometry, which is definitely open for comments and suggestions. The code snippets are stripped down versions directly from my basic 2D OpenGL rendering engine I have dubbed IronClad.

What Is Instanced Geometry?

Primitive rendering techniques have many copies of a single object's data. Say you wanted to draw a tiled map, with 2 unique tiles. Say, for instance (no pun intended), a floor tile and a wall tile. Now, each of these objects contains, at the very least, 8 floats for vertex positions, and 8 floats for texture coordinates. That's 8 * 4 + 8 * 4 = 64 bytes. If each instance of a tile contains this information for rendering, and you have 1000 wall tiles, that's 64 kilobytes of memory! And that's not even considering the other tile types. Obviously, this is an example of a very simple mesh with only 4 vertices. Most games have models with hundreds if not thousands of vertices, so you can see why it'd be a serious problem to have multiple copies of that data.

Of course, there's a simple solution to this problem; you keep around one copy of the data in the first object you create, and the other objects simply refer to the original, just in their own position. Well, that's exactly where instancing comes in!

Friday, October 19, 2012

Development On Hold

Throughout the course of development for Collapse, I had been relying on OpenGL's age-old immediate mode for rendering. This proved to be a serious hindrance as I kept adding more advanced features such as lighting and shadows. My previous post about shadows works extremely well when shadows are limited to a single light. Clearly this is unacceptable, and the various techniques I tried to get it functioning with many lights either proved to be much too slow in immediate mode, or would require a serious amount of restructuring of the rendering system.

So, I put everything on hold temporarily and decided to learn modern OpenGL. I found a superb series of tutorials through StumbleUpon, and have been following them to gain a good base in the modern features of OpenGL, such as vertex array objects, matrices, and indexed geometry.

This task has sparked the development of a 2D engine, which I have dubbed IronClad. I've made a lot of progress in the past few weeks, implementing a VAO wrapper, support for a custom mesh file format, indexed geometry, shaders, and other nice features. I have also made a switch from SDL to GLFW for window management, and abandoned SDL_ttf in favor of FTGL. The reason for this is that the latest stable version of SDL only supports OpenGL contexts using versions <= 2.1, and I need more than that. The latest development build, SDL 2.0, supports the versions I need, but I'd most likely need a serious refactoring of my SDL code base to support it, so I decided to just make the switch to something OpenGL-specific.

Saturday, September 29, 2012

Working With Shadows

The logical course of action after finishing lighting is to move on to shadows. I opted for a relatively simple, software-based approach. It involves casting rays from the light source to individual edges of the tiles in the collision map, and drawing black quads based on the rays.


In my current implementation, the shadows are independent of the other lights. Thus, shadows cast by one light will be left untouched if there is another light in the way. This obviously causes problems, and a better method that will calculate cumulative shadows is currently in progress. But for a single light, the following algorithm suffices. Hopefully some OpenGL beginners trying to create shadows can gain some knowledge from my own trial-and-error!

Thursday, September 27, 2012

Update News

The latest version has several new features, including:

  • Inventory screen (work-in-progress) that contains player stats such as health, ammo, and other detailed information about game progress. I still need my artist to draw me up large images of the tank and weapons.
  • Rasterizer system was completely removed, as it ended up being extremely complicated and not versatile at all. Also std::map would automatically sort entities, causing problems with render order.
  • Weapons are added, with a simple weapon editor script to generate the files. This allows lots of weapons to be created, edited, and tweaked easily, without relying on tedious recompilation.
  • A generic asset manager has replaced the stupid system I used previously, which was one manager for fonts, one for textures, and one for audio. Now, the asset manager just handles a single CAsset base class.
  • The CBullet class now inherits from a generic CParticle which should later allow particle effects to be implemented easily.

Latest screenshots:
In-game, with new shader.
It looks the same because I haven't included lights within the level yet.

Inventory screen (no weapon artwork)


Friday, September 21, 2012

Let There Be Light!

"And George said unto Collapse, "let there be light," and there was, and George saw that it was good."

Edit (2.1.2012): My lighting shader has changed quite a bit since this post; I opted for a multi-pass shader, rather than maxing out the shader variables.

After several weeks of reading about shaders, learning GLSL, learning about lighting, observing other projects, finally writing my own, and spending hours debugging, tweaking, and improving, it's finally done. My shader supports multiple lights, and gets re-written on the fly to support larger and larger amounts, due to GLSL loop limitations. Whenever I want to increase the amount of lights I use, I merely say:

    LightingShader.SetMacro("NUM_LIGHTS", ++lights);

Which will then re-write, re-compile, and re-link the shader with a new light count. Though I was considering not releasing the shader source code, here it is anyway:


Here are some screen-shots of lighting:


Original shader - one light (in-game)

Final shader - multiple lights (test zone)

Monday, September 10, 2012

The Show Goes On!

Fear not, the project has not been abandoned! The incredible Arma II zombie mod Day-Z has been sucking away a lot of my free time lately, so you guys must excuse my lack of new posts. Despite that time-wasting haven, I managed to make a significant amount of progress in Collapse:

  • AI prototyping complete
  • Revamped level editor with support for player spawns and fine-grained control over AI behaviors
  • Rasterizer for versatility in adding shaders to textures
  • Several memory leaks fixed, several new ones created
  • Debug logging system integrated into a majority of the subsystems
  • Settings.ini file for control over file names and directories without recompilation
  • Re-designed class hierarchy
  • Asset managers for texture, audio, and fonts
  • Replacing SDL_mixer with OpenAL
  • Removal of the "library" naming system in favor of namespaces
  • System requirements checking on launch (just OpenGL > v2.1 so far)

Thursday, July 19, 2012

AI Experimentation

Collapse is a game set in a post-apocalyptic world in which a human-created AI faction known as the Mechs have taken over. Therefore, AI must be an essential part of the programming.
After extensive research in path-finding algorithms, I decided upon the ubiquitous A*. Then, after days of trying to implement it, using many different techniques from just simple std::vector<Node*> lists to a much more complex and efficient std::priority_queue<Node> binary heap, I gave up. None of them worked properly, obviously due to faults in my programming, but I simple couldn't figure it out.
So I settled on a different approach: pre-defined movement paths. Obviously, this would significantly dumb-down AI decision-making, but I had to at least get something working. The map worked fine, but, again, after days of tweaking and planning and modifying, I couldn't even get the enemy tank to follow the path. I used a rather strange approach with lots of vector math and collision detection, which probably wasn't necessary. The algorithm (in pseudo-code) looked something like this:

Spawn:
    Target = FindNearestPath
    End

Update:
    If reached Target
        Target = FindNextTile
        If no Target
            Turn 3 degrees
    Else
        Adjust angle and drive.
    End

FindNearestPath:
    Find tile with minimum distance to entity.
    Return tile

FindNextTile:
    For each tile in AI map
        If tile collides with line-of-sight
          and tile not collides with entity
            Return tile
    Return no tile

Friday, July 13, 2012

Levels in Collapse

Collapse is the first game I've ever made that actually required levels, so it was quite interesting figuring out how to approach level design, loading, and storage. I definitely had to create some sort of level editor in order to easily design levels. Eventually, after much consideration, I decided that the easiest way to approach level handling would be to split every level into 4 basic components: Terrain, Collision, AI, and Game-Logic. 


Terrain


This map is pretty self-explanatory. It's stored with a .ctm extension (Collapse Terrain Map) and contains information about all the tiles on the map. Currently, since my artwork is fairly limited in the tile department, there are only two tiles available for placement: a floor and a wall. I knew that I'd be expanding later, and I couldn't bear to have a massive switch statement for every single type of file. So, I wrote a quick Python script to gather information about which tile images were available to use in the level, and then stored it in a file call ValidNames.dat. The script is really simple, since I have a special folder dedicated to files, it's pretty easy to find them all:


Collision


Having a separate map for collision makes it so I don't need to store which map tiles are passable and which aren't, and it also allows for more flexibility in terms of destroying tiles for any given reason. For example, when the player fires the tank weapons, if they make contact with the collision map, the collision tile contacted is removed and the terrain tile is changed to a "broken" version. The map is stored as a .ccm file (Collapse Collision Map) and just contains x, y coordinates of 32x32 tiles representing impassable areas.

Saturday, July 7, 2012

Design

It's a crisis of sorts. There is so much going on in my head that I can't seem to make sense of it all. Collapse is exponentially more complex than any game I've ever attempted, and it's beginning to overwhelm me. I don't want another rewrite, I want it right this last time. I'm not even back to the point where I was previously, because some serious design decisions must be made before I can progress.


Thoughts

There are many things that must be accomplished every frame, and so many different ways it can happen. I have already committed to a state-driven engine system, with states such as e_MAINMENU, and e_INTRO. Each primary subsystem has access to a Game_State& reference, so it can modify it as it wishes. Though, this may be changed to reflect another state, a sub-state if you will, that switches between actions within a primary engine state. Such as a e_HUD state within the e_GAME engine state. This is still in consideration though, and the more I think about it, the better of an idea it seems. In addition to this minor dilemma, many other things still hinder me. In any given frame, there could be event handling, level updating, collision detection, object rendering, HUD updating, and dozens of other operations. None of these are mutually exclusive, nearly everything depends on or interacts with something else. My idea is to split everything into 3 primary subsystems: World, HUD, and Menus. The game engine will take care of interaction between them, such as passing them between each other when necessary. Hopefully I won't create circular dependencies... That'd be bad. 


World

This will be a class, most likely named Game_World, since it is indeed a game-specific element. It will handle most of the game mechanics, such as rendering of objects on-screen, map loading/updating/saving/rendering, enemy AI tactics and operations, player event response, and all collision detection between those elements. It will need to share an inventory system, and possibly more, with the HUD subsystem.

The Importance of Commenting Code

When you think about it, it seems fairly obvious. Comments can clarify and explain the purpose of any of your code, from variables to functions to entire namespaces.
Throughout Collapse, I decided to implement a Doxygen commenting system. Doxygen is a command-line program that generates documentation from code comments. It's really handy and clean, and though I do not see much use for it in terms of Collapse because I'm not actually releasing some sort of documentation, it provides a uniform commenting style that encourages me to comment everything well.

The reason I decided to do this is because I realized how unclean and confusing my code was. Here's an example line:
float angle = DEG(atan(abs(y - this->GetY()) / abs(x - this->GetX()) * 1.0f));
I had to look at this for a good five minutes before realizing what this actually did; it determines the angle between the player position and the mouse location. It's after this moment that I realized some sort of commenting system was essentially, and thus began re-write #3.